After a race season devastated by COVID-19, many triathletes and roadies have flocked to the promising lure of gravel racing. With the ability to ride more socially distanced, stay away from traffic, and the added benefit of riding in some of the most beautiful locations, it’s safe to say that gravel is here to stay. More than any other year, the 2021 calendar is being filled with gravel events like The Wasatch All-Road, the iconic route of the Stupid Pony, Crusher in the Tusher, SBT GRVL, and Unbound Gravel (formerly Dirty Kanza). Distances range from 30 miles to staggering 200-300 miles…and even 300 mile tandem categories…for people who ride tandems…on gravel. With a new realm of bike racing comes the common question: “How in the world do I train for this?” This article will offer a high-level view to the chasm of information and advice surrounding the gravel scene. For more information, or to schedule a consultation with a White Pine Athletics Coach, email info@whitepineathletics.com.

Train on Mixed Surfaces
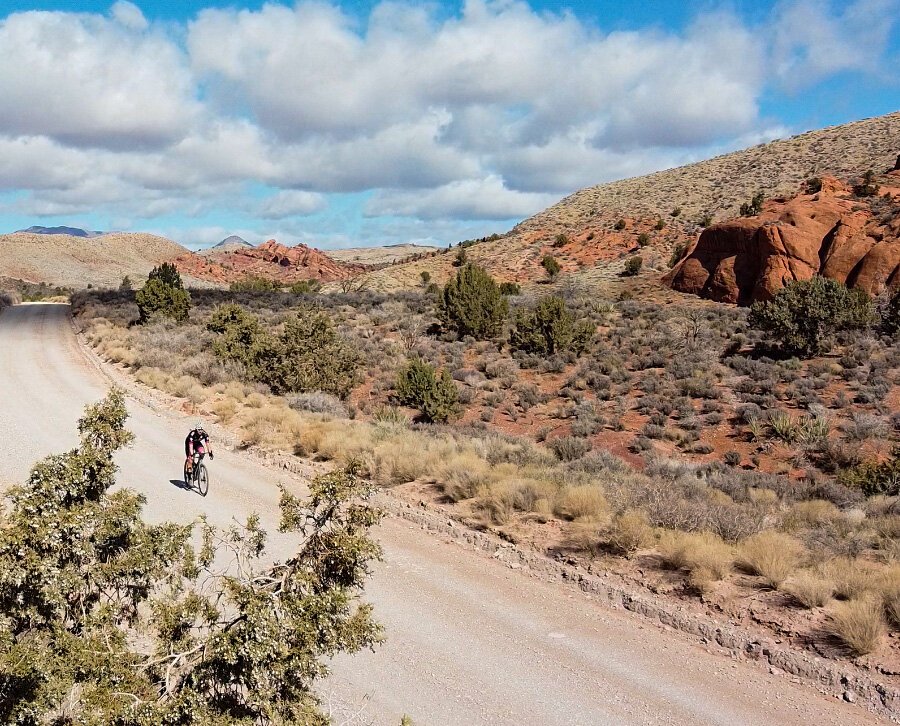
If you’re reading this article, you’ve either already registered for a gravel event, or you at least have your eye on one. It’s a safe bet to assume that come race day, you will be spending a good amount of time riding on gravel…I know, I’m as shocked by this as you. But, not all gravel is created equally. Depending on the location of your event, you could be riding the same hard-pack gravel all day long, or you could be faced with a myriad of textures, densities, and levels of moisture, each requiring their own skillset as a rider. One of my favorite training rides here in the Utah desert contains derelict potholed roads, miles of washboard, perfect hard-pack, sand, rock gardens and the occasional stream crossing and/or mud. This is one of my favorite rides because it requires me to have diverse skillset as a rider. The majority of your training can be done on the road, or even on inside on the turbo-trainer, as this is still one of the best ways to focus specifically on fitness by isolating and targeting specific energy systems. However, all the fitness in the world can’t prepare you for the sense of fatigue and other sensations of riding on various surfaces for hours on end. Don’t let race day be your first time encountering those types of road/trail conditions.
Develop Bike Handling Skills
You may have already been racing on the road for years, and the knowledge and skills you have acquired will no-doubt prove useful when transitioning over to gravel. However, not all skills are equal, and not everything transfers over seamlessly. Braking, descending, cornering, pack riding, even climbing in and out of the saddle- each of these skills range from slightly to vastly different between road, mountain bike and gravel disciplines. Working with your coach, or through self-identified weaknesses, spend some time perfecting these skills. You can have the highest FTP in the pack and climb faster than everyone else, but if you can’t descend efficiently on steep/loose terrain, you risk getting passed by everyone you smoked on the climb, or worse, crashing out.

Pairing nicely with the section on riding mixed surfaces, some skills are unique to the surfaces you are riding on. Knowing how to ride and position yourself on single track is something a lot of XC MTB find as easy as putting on their socks in the morning, but is never an obstacle roadies or triathletes have previously encountered. Even riding in the peloton offers a unique challenge on gravel. Riding someone’s wheel on gravel comes with the same benefits as the road: the ability to work as a team, to utilize another riders draft, and sometimes it just nice to have someone to chat with. However, a level of complexity is added by the fact that you are riding in a pack of riders, within a plume of dust that can significantly impair your vision. Knowing how to position within the pack, and have the skill to make on-the-fly tweaks to your line will be essential. Across all disciplines of cycling, bike handling skills are easily the most overlooked methods of getting faster on the bike. Do yourself an invaluable favor and dedicate some time each week to working on a skill.
Develop a Nutrition Plan
An integral part of every training/race plan is to develop a nutrition plan, this is nothing new. However, depending on your bike handling skills, the course terrain, and frequency of support stations, eating/drinking during a gravel event might be harder than you thought. In big fondo events and IRONMAN races, you are gifted with the ability to stop for a snack at an alarming frequency. Depending on the gravel event you sign up for, you may be faced with significantly fewer aid/support stations, or in some cases none at all. It’s important to do your research and figure out just how much nutrition you need to carry with you. In some scenarios, it might be wise to outfit your bike with a handlebar bag, or frame bag. Adding a frame/bar bag allows you to carry all your essential gear, from flat kits, spare chain lube, extra layers, and your cherished on-the-bike snacks (hello red vines and jelly beans). It might also be worth considering a small hydration pack. You could be riding in hot, dry locations, and most bikes only accommodate 2 (sometimes 3) bottles. Again, depending on the event distance, and the level of support, 2 bottles may not be enough. I am personally a big fan of the USWE Airborne pack – it stores a good 2 liters of water and sits nice and high on my back, which allows me to maintain access to my jersey pockets. Keep in mind that water and electrolyte intake will vary dependent on things like altitude, humidity, and temperature. With more distance between (or lack of) aid stops, be sure you have enough water with you.
Now that you have worked out nutrition storage, it’s time to work out your nutrition plan and learn how to execute it. These are long races: knowing what your body can tolerate and what to avoid is huge. Spend some time evaluating different products and different levels of viscosity. My go-to lately has been the PNG Lemon Meringue gels. They taste amazing, and aren’t super thick like some other gels. This is important because you will be trying to eat while actively riding on uneven terrain. Super thick gels, or solid foods can be difficult to eat while riding gravel, especially when you need to wash it down with a drink after every bite. A less viscous gel is easier to take in on the fly and requires less water. This allows me to fuel quickly and safely. Additionally, you can load your bottles or hydration pack up with a carbohydrate mix and use that as your primary fuel or to supplement your gels. Either way, develop this system well in advance and practice it on training rides. Know how your stomach will feel with the course conditions, including terrain, temperature, distance, etc.
Saddle Time
We talked a bit already about just how different gravel is than road. One primary difference commonly seen is a decrease in average speed from road to gravel. This makes sense if you consider the fact that you’re running chubbier tires, riding on rough terrain, and most likely carrying a bit more weight on you in the form of food, flat repair kits, and layers. In fact, referencing back to LOTOJA and the Stupid Pony events- an average finish time for LOTOJA can be anywhere from 9 to 13 hours. The average finish time for the Stupid Pony gravel race was 17 to 20 hours. Remember, these events had roughly the same distances but the gravel riders took a good amount of time longer. I should also point out that these riders were by no means slow, quite the opposite, gravel is just inherently slower. It is important to keep this in mind when training. If you are preparing for a 35 mile gravel event by performing 35 mile training rides on the road, keep in mind you may need to log some additional time in the saddle. Again, it doesn’t matter how fit you are compared to the rest of the field if your bum can’t tolerate the required amount of time in the saddle.
Gear Selection and Bike Fit
Both literally and figuratively, gear selection will be a huge determinant of how happy you are going to be during your first gravel event. Let’s first look at gear selection, as in, what your drivetrain setup will look like. Some gravel bikes come from the manufacturer with a 2x setup (2x referring to the number of chainring options at the crank), while other bikes will come stock with a 1x setup (as in one chainring). When it comes to gravel riding, I very much prefer a 1x setup. In some cases this can shed a bit of weight off the bike, but more importantly this removes the need for a front derailleur. In my mind, this is one less thing that could break or give me grief in the middle of a race. Especially if the weather takes a turn for the worse and you have to start worrying about mud.
When making the decision about your drive train, you will be choosing the size of your chainrings at the crank as well as the range of the cassette. There are a few things to consider when building your bike up for race day. First and foremost: elevation profile. If your course is filled with long, steep climbs, then you will want to opt for gearing that will make those climbs a bit more pleasant. On the other hand, if your course is mostly flat with rolling hills you can get away with a more aggressive gear selection. There are tradeoffs on each end of the spectrum. If you’re running a gear selection chosen to get you up steep climbs you may find yourself spinning out on the flats or descents. On the other hand, if you’re running gearing more fit for the flats you may find yourself walking on some of the steeper climbs. The best you can do is get an idea for the profile of the race, and consider your goals within the race and then decide what gearing options fit best. As always, it’s never a bad idea to do a little course recon. Plan a weekend to run through portions of the course and see how your gearing stacks up to the climbs, or if you end up losing too much speed on the flats.
For perspective, on my current gravel bike, built for the steep climbs of the Utah desert and surrounding valleys, I am running a 1x setup with a 38-tooth front chainring and an 11/42 rear cassette. Thus far I haven’t had any need to hike-a-bike, even on sustained grades over 10%. However, I have noticed that I begin to spin out at around 28mph-32mph when I’m on the flat fire roads. For the conditions that I typically ride in, this is a fair tradeoff in my opinion.
Outside of gearing, another thing that has the potential to damper your big day is bike fit. This is nothing new to those who have experience racing and riding for long distances. Gravel fit often comes down to preference and comfort. Most people recommend a more upright position compared to their typical race position on the road. This compliments the fact that gravel bikes typically have a more slack headtube angle. If you consider that you will be riding bumpier terrain, and spending more time in the saddle than you might on your road bike, this makes a lot of sense. That being said, some (myself included), try to match their gravel position as closely as possible to their road/race position. For me, this minimizes the chance of having to spend time adjusting to a new or different fit, and when I switch between bikes throughout the week, it’s as seamless as possible for my body. I only recommend going this route if you’re comfortable riding that position for a good deal of time. It’s not terribly uncommon for me to do 10+ hour days on my road bike, so I know my body can tolerate that position even on gravel. Either way you swing, a proper bike fit is crucial to all day comfort on the bike.
Create a Plan, Consult Your Coach
The gravel scene may look different from what we are used to seeing as cyclists and triathletes. Rather than the sea of spandex and lycra of your typical road race or gran fondo, gravel embraces the utilitarian use of flannel, cargo shorts and the occasional pair of Chacos. Athletes trade in a course filled with course marshals, stop signs, and buttery-smooth tarmac for rutted country roads, washboard gravel, open spaces and a face covered in dirt. But, there is one thing that remains the same between the two worlds of cycling: those who follow a training program and have a well thought-out race-day plan have a significantly higher chance of completing their goal, and enjoying it in the process.
Though incredibly beautiful and rewarding, gravel events are notoriously hard, typically with a staggering rate of attrition. The 2020 Stupid Pony, a 200+ mile gravel event following the historic Pony Express Trail across the Utah West Desert saw that nearly 60% of racers DNF’d (did not finish). Compare this to the 10% who DNF’d at the 2019 LOTOJA, a 200+ mile road race from Logan, UT to Jackson, WY (a course with a significant amount of climbing). The two events were of similar distance, but had vastly different outcomes. This illustrates the crucial need to develop a training plan to meet the required needs of your chosen race, and the unique demands of gravel racing. Yes, a lot of this can be figured out through research, as well as trial and error. However, consulting a coach can save you hours of needless research and help you develop a plan to line up on race day with the fitness, knowledge, and confidence to race your best.
In the new world of gravel racing, there are some amazing courses, with fun events and races popping up everywhere and a whole lot of variables to consider when training for your first event. While not exhaustive, this guide should get you started and on your way to crushing your first of many gravel events.